Picture this: a friend drops a WhatsApp photo of a full Italian menu. You’re hungry, the words are mysterious, and you need answers—fast. Or you’re staring at lecture slides shared as screenshots in German. Copy‑paste won’t help because the text is trapped in pixels. The good news: your iPhone can translate images and screenshots quickly—and you don’t have to ruin the image quality to do it. This guide shows the exact tools and workflows I use to translate from Photos, Camera, and apps, while keeping your original visuals crisp and untouched.
You’ll learn: how iPhone’s Live Text + Translate overlay results without modifying the source, how Google and Microsoft handle camera/import translation, how to preserve quality when sharing, and when to automate everything with a single Shortcut.
Table of Contents
Why “no quality loss” matters (and where loss happens)
Translating text in an image should never destroy the original image. The safest workflows overlay or display the translation separately, leaving your screenshot/photo untouched in Photos. Quality loss usually creeps in when you:
- Save a new flattened image after editing text directly on top.
- Share via apps that compress by default (e.g., some messengers).
- Re‑export at lower resolution or with aggressive JPEG compression.
Apple’s Live Text + Translate approach is non‑destructive: it identifies text, shows a translation overlay, and keeps the original file intact. Google’s camera and import tools also leave the source image alone; they render overlays transiently or output a separate result for you to save if you want. With the right sharing choices and file formats, you can read everything you need—no pixelation, no blur, no regret.
Quick start: 90‑second checklist
- Update iOS: Settings → General → Software Update (better OCR, Live Text stability).
- Enable Live Text: Settings → Camera → Show Detected Text.
- Add Translate packs: Settings → Translate → Downloaded Languages (for offline basics).
- In Photos: open screenshot → press‑and‑hold text → Translate.
- For signs/menus: open Google Translate → Camera → overlay or import your screenshot.
- Share full‑quality: prefer AirDrop, iCloud link, or “Document” mode in messaging for uncompressed images.
Power users: automate it with a one‑tap Shortcut that detects text in clipboard or the last screenshot, translates, and shows an overlay. Learn how in: Create an iOS shortcut for instant translation.
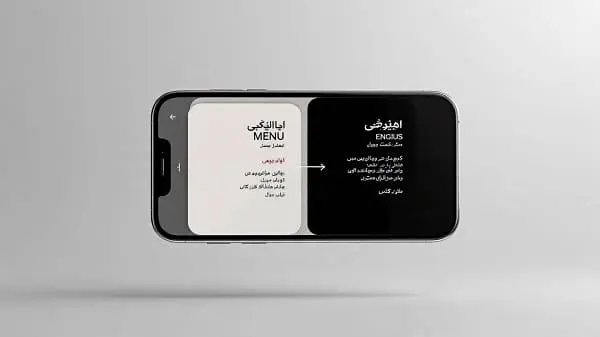
Live Text + Translate (Photos & Camera) step‑by‑step
Live Text recognizes text in photos, screenshots, and the Camera viewfinder. Combined with Apple’s Translate, it’s the fastest way to understand images without changing a single pixel of your original file.
Translate a screenshot or photo in Photos
- Open Photos → select the screenshot or photo with foreign text.
- Press‑and‑hold on the text until the Live Text selection appears.
- Adjust the selection to the exact lines you want (avoid icons or background text).
- Tap Translate → choose your target language if prompted.
- Read the overlay; tap options to copy, look up, or share the translated text.
By default, this does not modify the image. You can back out any time; your original remains pristine in your library.
Translate directly from Camera
- Open Camera → point at the sign/menu/book.
- Tap the Live Text icon that appears in the corner.
- Select the text lines → tap Translate.
Offline behavior: Live Text extraction is on‑device. Translation can work offline for many language pairs if you’ve downloaded packs in Settings → Translate. Otherwise, iOS may use secure Apple servers when online.
Google Translate: camera overlays & screenshot import
Google Translate covers 100+ languages and excels at camera overlays and quick imports from Photos. It’s ideal for travelers who bounce between scripts and menus all day.
Use camera overlay
- Open Google Translate → tap Camera.
- Point at the text; an English (or your target) overlay appears in real time.
- Tap the shutter to freeze and refine selection if needed.
Import an existing screenshot
- In Google Translate → Camera → choose Import.
- Select the screenshot from Photos; Google scans and shows translation regions.
- Tap lines/areas to view or copy translations. Your original remains unaltered.
Offline mode is available for many languages—download packs before you travel. Overlays are rendered by the app, not baked into your file, so you can read everything without degrading your source image.
Microsoft Translator: document‑friendly layouts
Microsoft Translator can translate imported images with more attention to layout than many free tools—handy for scanned documents, event posters, and slide screenshots where structure matters. It keeps your original untouched, and you can copy out just the translated sections you need. If you live in Office apps (Word, PowerPoint), the workflow is especially smooth during business trips.
Tip: When the visual structure carries meaning (tables, numbered steps), import into Microsoft Translator first to preserve layout cues, then copy key passages to your notes.
Rare languages & handwriting (Papago, iTranslate)
For Korean, Japanese, and Chinese, Papago is a strong specialized companion. For messy handwriting or stylized fonts, iTranslate sometimes recognizes tricky letterforms better than general tools. You can run the same screenshot through two apps in 10 seconds and pick whichever reads best. Even here, your original image stays intact; the apps display overlays or extracted text separately.
Pro tip: Translate the heading (dish name, section title) first, then the description—the two results should make sense together. If they don’t, try an alternate app or re‑capture with better lighting.
Preserve image quality: do this, not that
Do
- Keep the original in Photos. Use overlays and copy text out—don’t flatten translations onto the image unless you must.
- Share full‑quality. Prefer AirDrop, iCloud link, or Files. In some messengers, choose “Send as document” to avoid compression.
- Prefer HEIC/PNG for text. Screenshots are PNG; camera shots are HEIC/JPEG. PNG/HEIC keep crisp edges for UI/text.
- Crop, don’t rescale. Cropping removes clutter without reducing resolution.
Don’t
- Don’t re‑save the same image repeatedly through random editors.
- Don’t screenshot a screenshot unless you’re removing sensitive sections; it can add compression or artifacts in some flows.
- Don’t use “Low Quality Image Mode” in Messages when clarity is critical.
If you must annotate, save a separate copy: Original for archiving, Annotated for sharing. That way you always have a pristine source.
OCR capture tips that boost accuracy
- Light and angle: Avoid glare; hold the phone square to the page.
- Fill the frame: Get closer instead of extreme digital zoom; use 2× optical when available.
- Steady hands: Tap to focus; use gridlines to align text.
- Separate columns: Translate one column/section at a time for cleaner reading order.
- High contrast: If the text is faint, raise exposure slightly, then import.
- Scan mode: For pages, use the built‑in document scanner (Notes → New Note → Camera → Scan Documents) for a flat, readable image.
One‑tap workflows (Shortcuts, Share Sheet, Messages)
Once you’ve translated a few images, you’ll want to speed it up. Here are three simple automations that reduce taps and keep quality intact.
Last Screenshot → Translate
- Shortcut pulls the latest screenshot from Photos.
- Runs Live Text extraction; sends text to Apple Translate.
- Shows a quick preview you can copy or save.
Zero editing, zero compression—your screenshot stays untouched.
Share Sheet Switcher
- Action menu in Photos: open with Google (overlay) or Microsoft (layout).
- Let the page type dictate the tool—menus/signs vs. documents.
One flick, the right engine, first time.
Clipboard Instant
- Copy any text‑heavy image link or OCR result.
- Shortcut detects language → translates → shows options to paste to Notes or send in Messages.
Perfect for study notes and group chats.
Want a ready‑made template with all the pieces wired up? Follow our tutorial to build it in minutes: Create an iOS shortcut for instant translation.
Comparison table: best tool per scenario
| Scenario | Best tool | Why |
|---|---|---|
| Screenshot of lecture slide (PNG) | Live Text + Apple Translate | Non‑destructive overlay; fast copy to notes |
| Menu or sign while traveling | Google Translate (Camera) | Instant overlays for quick reads; broad language support |
| Scanned poster/contract | Microsoft Translator | Better layout preservation for tables/sections |
| Handwritten note screenshot | iTranslate (backup) | Recognizes stylized/handwritten forms better in some cases |
| KR/JP/CN signage & menus | Papago | Specialized models tuned for Asian languages |
Troubleshooting map: error → cause → fix
| Issue | Likely cause | Fix |
|---|---|---|
| Text isn’t selectable in Photos | Live Text off or low contrast | Enable Camera → Show Detected Text; crop/brighten; re‑try |
| Translation looks robotic | Idioms/slang; long sentences | Translate smaller chunks; cross‑check in a second app |
| Overlay covers wrong lines | Busy layouts; mixed columns | Select one column/section at a time; use import mode |
| Image looks blurry after sharing | App compression | Use AirDrop/iCloud/Files; in messengers use “Send as document” |
| No translation offline | Language packs not downloaded | Install packs in Settings → Translate or Google offline settings |
| Handwriting misread | Illegible strokes | Try iTranslate/Papago; increase contrast; re‑capture closer |
Privacy & offline use
With Apple’s Live Text + Translate, text detection is on‑device, and many pairs can translate offline when packs are installed. That’s excellent for privacy and roaming. Google and Microsoft also offer offline packs; when online, they typically use cloud processing for accuracy and speed. A safe rule: keep sensitive images local (no uploads); read overlays on device; copy only the necessary text.
- Airplane Mode test: Try a translation with data off to confirm your offline setup.
- Redact before cloud: If you must upload, crop out names/IDs first.
- Minimal exposure: Translate the smallest region that conveys meaning.
FAQ
Will translating a screenshot lower its quality?
No. Live Text and reputable apps overlay translations or show extracted text separately. Your original image in Photos stays untouched unless you choose to save a modified copy.
What’s the best way to share images without compression?
Use AirDrop, iCloud link, or Files. In some messengers, choose “Send as document” to avoid automatic downscaling and recompression.
Can I translate images offline?
Yes, for many language pairs. Download Apple Translate packs in Settings → Translate or Google’s offline packs. Live Text detection is on‑device; translation may need packs or an internet connection depending on the pair.
Which app handles menus and signs best?
Google’s camera overlay is very strong for quick scans. Apple Live Text is precise for line‑by‑line translation and privacy‑friendly. Try both and go with the result that reads most naturally.
How do I speed this up on iPhone?
Build a Shortcut that grabs the last screenshot, extracts text, translates, and shows a preview. Follow our guide: Create an iOS shortcut for instant translation.
References
- Apple Support — Use Live Text on iPhone
- Apple Support — Translate on iPhone
- Google Translate Help — Use your camera
- Microsoft Translator Docs
- Apple Support — About HEIF/HEVC media on Apple devices
Features vary by language, region, and app version. Always confirm on official support pages.

Aarav Sharma — Founder & Editor, WA Translator. I publish hands‑on, privacy‑first guides on WhatsApp translation, iOS Shortcuts, and AI translators. All workflows are tested on real devices (EN↔AR) with screenshots and downloadable Shortcuts. About Aarav • Contact